Ondeh-Ondeh inspired cake

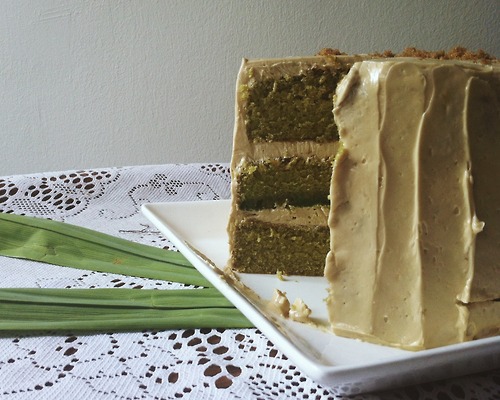
“Ondeh-Ondeh” is a peranakan dessert that is very famous in South-East Asia, mainly Malaysia and here in Singapore. These treats are made from gluttonous rice four with water and Pandan leave extract to form a dough. The dough is then wrapped around palm sugar(Gula Melaka) pieces and boiled. To finish it off, Ondeh-Ondehs are rolled in shredded coconut before serving. The palm sugar that’s within the cute little Ondeh-Ondehs bursts in to your outh with every bite.

So my main inspiration for the recipe was to infuse the flavours from Ondeh-Ondehs which are Pandan, Palm Sugar and coconut in to a cake.

pandan cake

Gula Melaka swiss meringue buttercream

4 egg whites

200g gula meaka chpped up fine

100g whitesugar

450g unsalted butter

Pandan cake

8 eggs

200g plain flour

½ tsp bking powder

200g melted butter

6 tablespoon pandan extract

Pandan extract

10-12 pandan leaves

3-5 talespoons of water

Shredded/desiccated coconut for garnish

Method:

  1. Wash pandan leaves, cut them up in to small pieces and add them in to the blender with water and blend until it forms paste.
  2. Extract as much liquid as possible from the paste using a sieve.
  3. In a mixing bowl with a whisk attachment, beat eggs and sugar on high for about 10 minutes until ixture increases in volume.
  4. Add sifted flour, baking powder and pandan extract
  5. Bake at preheated oven of 160 degree celcius

Swiss meringue buttercream

  1. Add egg whites, white sugar and palm sugar in to a heatproof bowl over a ban marie.
  2. Stir constantly to dissolve sugar crystals then take off heat.
  3. Transfer contents in to mixer and ix on high with whisk attachment until stiff peaks and cooled
  4. Add in butter(cubed) one at a time making sure it has been fully .incorporated before adding more butter cubes.
  5. Frost cake and top with toasted shredded coconut

I hope you give this a try at home! It’s not too sweet for a cake and I really like it! Till next time, good luck!

cookforme@live.com                   v
Shrimp Pot Pie

Image


Serves: 1

Ingredients:

  • 9 medium to large shrimps
  • 1 medium onion, diced
  • 2 cloves of garlic, minced
  • Zest of half a lemon
  • ½ cup cream
  •  Two small russet potatoes
  • ½ a cube of chicken stock
  • 1 egg
  • Salt, pepper, and preferred herbs
  • 2 tablespoons of butter
  • Store-bought puff pastry (or you can make your own short rust pastry crust as well.

Method:

  1. In a small pot bring to boil some water and add the stock cube to boil the potatoes
  2. Peel your prawns and save its shell.
  3. Remove potatoes once cooked and add in prawn’s head and shells in to the chicken stock.
  4. Season your shrimps with the lemon zests for at least 20 min in the fridge.
  5. Sauté your diced onion and garlic in butter and add in your seasoned prawns.
  6. Quickly spoon in a ladle of prawn/chicken stock and add in your cream. Stir until the gravy reduces and thickens.
  7. Season with some salt, pepper and herbs.
  8. Spoon in to ramekins and top it with your puff pastry.
  9. Beat up your eggs with a little bit of water and brush it on the surface.
  10. Bake in a preheated oven at 180°C for 20-25 minutes or until the pastry has turned golden brown.

Roasted Chicken and Cream Pasta

thenavycatandfood.wordpress.com

Last Monday’s lunch menu was a simple and quick roast chicken to feed 2-4 pax. You could fry it or put it on the grill but I did mine in the oven.. I don’t wanna get all draggy so lets get straight to the ingredients.

Ingredients:

  • 5 chicken thighs (bones and skins) 
  • 1 medium red onion
  • 5 cloves of garlic (used a lot of garlic because I really love the flavour it gives)
  • 5 tablespoons of butter (cold and cut in to 5 separate thin knobs)
  • 2 tablespoons of honey
  • 2 teaspoons of light soy sauce
  • Seasoning: Dried mixed herbs, salt, pepper

Method:

  1. Rinse and pat dry the chicken thighs and put them in a bowl.
  2. Cut the onions in to rings and smash the garlic cloves individually and ass them all in the bowl
  3. Add the rest of the ingredients with a good helping of salt, pepper and mixed herbs.
  4. Leave to marinate for at least an hour or preferably overnight while you preheat your oven to 200 Degree Celsius
  5. Arrange your chicken thighs in your tray skin side up and make pockets under the skin.
  6. Stuff the onions, garlics, and finally the knob of butter to keep the meat from drying out in the oven.
  7. Bake in the oven for 40 minutes and take it out to check if the meat has completely turned opaque and the juices has run clear.
  8. Serve! 

thenavycatandfood.wordpress.com

I drained the excess fat from the thighs by putting it on a wire rack above the same pan the chickens were baked in. You can choose to discard the excess fat from the pan or keep it in a jar and refrigerate and it will turn in to a really flavourful chicken/garlic butter which you can use to baste your chicken while grilling or use it to cook paste like what I did immediately after I roasted my chickens.

Serves 1-2

Ingredients:

  • Spaghetti (the amount is to your preference. 
  • 3/4 cup of heavy cream or cooking cream
  • Half an onion, diced
  • 2 cloves of garlic, minced
  • salt and pepper for seasoning
  • Chicken/garlic butter

Method: 

  1. Boil your pasta in salted water until just before al-dente 
  2. In a frying pan, melt the garlic chicken butter collected from the roast earlier and sauté the onions followed by the garlic.
  3. Pour in the cream and let it thicken in the pan for a few minutes.
  4. Season the cream sauce pasta and finally add in the drained pasta in to the sauce for a few minutes and turn off the heat.
  5. Allow the pasta to turn in to al-dente and absorb the flavour from the sauce at the same time. Viola!!
  6. Serve.

These two recipes make a quick and easy dinner for unexpected guests in under an hour if you’re good with managing the time and stuff. Thanks for stopping by, good luck!

For enquires and local orders: cookforme@live.com


Dark Chocolate Mousse Cake

Image

Image


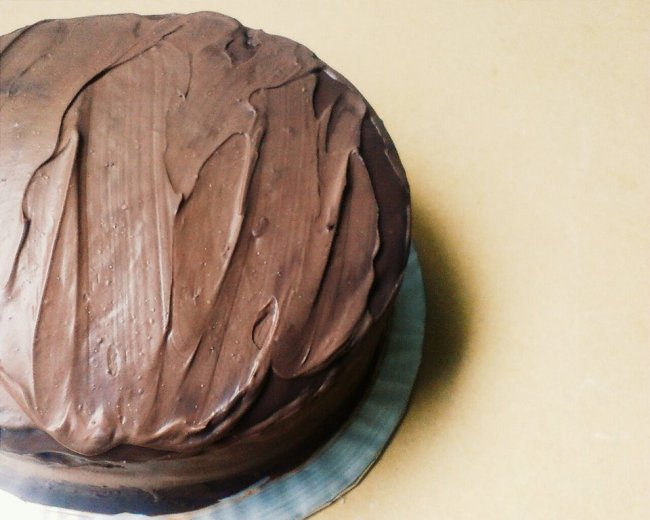
A week ago, a friend of mine came up to me and asked me what my best chocolate cake was. I told him it was my brownies, but he didn’t want something too dense. I kinda knew what he meant, so I decided to make him a dark chocolate mousse cake instead.

I baked a regular chocolate sponge cake but lowered the sugar content(as requested). Then I made some chocolate mousse with 70% dark chocolate and heavy cream of 35% fat content. I left the bottom layer of the cake in a spring-form tin and stacked the (then softened) mousse on top and smoothing it out evenly leaving about 3 tablespoons of mousse aside. Refrigerate for an hour and take it out. Smooth out the remaining mousse and stack on the second layer and leave to refrigerate in the spring-form tin for another hour or two to ensure the cake and the mousse holds its shape well. 

In the mean time i made some chocolate ganache by using equal parts of the same 35% heavy cream and 70% dark chocolate. I allowed my ganache to cool down to room temperature(consistency is still rather loose), removed the spring-form tin from the cake and poured half of it over my cake as a “crumb-coating” in a way. I left the cake in the fridge to allow the ganache to firm up a little bit. I also left the other half in the fridge to achieve a thicker consistency.

After twenty minutes I took both the cake and the ganache out from the fridge and complete my finishing touches. I smeared the (already thickened) leftover ganache with a spatula to create smear/spread marks. Since the ganache has already thickened, it holds the shape really well. I left the exterior very plain and rustic to let the taste do all the talking(hehehe). 

Gladly, my friend and his family loved it.. It met his expectations of “chocolatey”

I have posted the recipe for the cake and the mousse before if you’d love to give it a shot at home. That’s all for now, good luck!

Chocolate cake recipe: https://thenavycatandfood.wordpress.com/2013/10/01/chocolate-swiss-meringue-buttercream-2/

Eggless chocolate mousse: https://thenavycatandfood.wordpress.com/2013/11/27/eggless-chocolate-mousse/

For enquires and local orders email me at: cookforme@live.com

Salmon steak

image

Salmon is my favorite fish after Sea Bass. Its creamy, rich flavour and its smooth crumbly texture falls apart and melts nicely in your mouth IF done right in the kitchen.

Today I made a medium rare salmon steak for a salmon pie which I later added in to a home made crust and further baked (hence the medium rare).
This steak would be good if served with mashed potatoes and steamed brocoli as an amateur and quick dinner or eaten just by itself.

SERVES 1
Ingredients
1 Salmon fillet
2 teaspoons olive oil
2 large cloves of garlic (grated or minced)
Salt & black pepper
Mixed herbs
Oil for frying

Method
1. Marinate the fish with all the ingredients.
2. Leave to marinate I’m cling wrap overnight or at least an hour to seal in flavour.
3. Fry it skin side down until meat turns opaque halfway (about 5-10 mins)
4. Flip the salmon once and never again and cook for 5-7 mins until just a thin layer of meat is left translucent.
5. Allow meat to rest before cutting up.
6. Serve.

Easy, fuss free, and tastes so good. Bon appetite!

Eggless chocolate mousse

Image


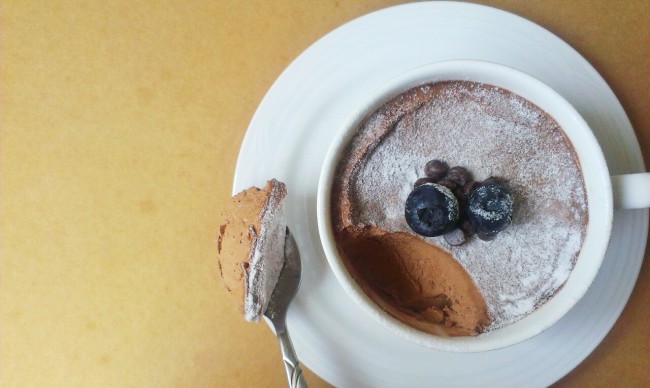
Chocolate mousse is really versatile. The velvety texture of the mousse allows easy manipulation, and just by playing around with the chilling time, you can achieve a soft or firm mousse. You can choose to eat it on its own, add a thin layer of it in between two chocolate cakes or you can even use it to frost cupcakes if you wish. 

This mousse recipe contains no eggs to minimize any complications and discard the fear of consuming raw eggs. This recipe’s ingredients is the same if you were to make a ganache, the only difference is the way the chocolate and the cream is combined. Also, some people add a tiny bit of espresso powder to enhance the chocolate taste. I however, dislike coffee and its strong taste so I just went without the espresso powder.


Yields: 4-5 cups (estimated)

 200ml whipping cream/heavy cream

100g Valrhona or good quality dark chocolate (75% and above)

Method:

  1. Melt the chocolate with a table spoon of heavy/whipping cream by double boiling or in the microwave.
  2. Whip cream until firm stiff peaks. (Tip: Put mixing bowl and balloon whisk in the freezer and take out only right before whipping the cream. This allows the cream to turn in to stiff peaks faster and hold better.)
  3. Add cooled melted chocolate in to the whipped cream and fold in until chocolate is well combined,
  4. Spoon the mousse in to serving cups and leave to chill in the refrigerator for at least 4 hours or over night.

Chocolate swiss meringue buttercream

Commonly, cupcakes and cakes are usually frosted with buttercream icing which mainly comprises of butter and a truckload of icing sugar.
For some, it might be way too much sugar in one mouthful considering the amount of sugar that goes in the cakes itself.
Swiss meringue buttercream is a silky smooth icing that isn’t too sweet and has a great texture that is similar to that of the traditional buttercream. However, unlike the traditional frosting, the swiss meringue does not crust up after a while. This means that it isn’t suitable for piping of buttercream roses and such.

Without further a do, here’s the recipe for  chocolate cupcake with chocolate swiss meringue buttercream.

Chocolate cupcake
Ingredients:
250g soft butter
250g caster sugar
200g self-raising flour
2 tbs cocoa powder
3 tbs milk
1 tsp vanilla essence
2 eggs

Method:
1. Cream butter, vanilla and sugar until pale and fluffy at high speed.
2. Add in eggs one at a time to prevent curdling
3. Bring the speed down to low and gradually add in flour and cocoa powder.
4. Once well combined, spoon in to cupcake liners.
5. Bake in preheated oven at 180 degree celcius for 15-20 minutes or until a toothpick inserted comes out clean.

Chocolate swiss meringue buttercream
Ingredients:
4 egg whites
300g caster sugar
400g unsalted butter
400g dark coverture chocolate

Method:
1. In a heatproof bowl, combine sugar and egg whites and set over a double boiler.
2. Using a whisk, keep stirring until sugar granules have dissolved (do not stop cooking, we don’t want to solidify the whites)
3. Once mixture is smooth and warm to touch, remove from heat and transfer to a mixer.
4. Whip the mixture on high speed until it forms stiff peaks and has cooled down.
5. Add in firm and slightly soft (not hard) butter in small cubes one at a time keeping the mixture on medium speed.
6. Once well combined, add in cooled melted chocolate in a steady stream while mixer is on low speed.
7. As soon as all the chocolate has been added, increase speed to high until well mixed.
8. Ready to use immediately or you can refrigerate to firm up the texture.

image

I left no toppings on the cupcakes but you can use m&ms or crushed nuts. To your preferance. Thank you for visiting!

cookforme@live.com
@thenavycat (instagram)

Snowskin Mooncakes

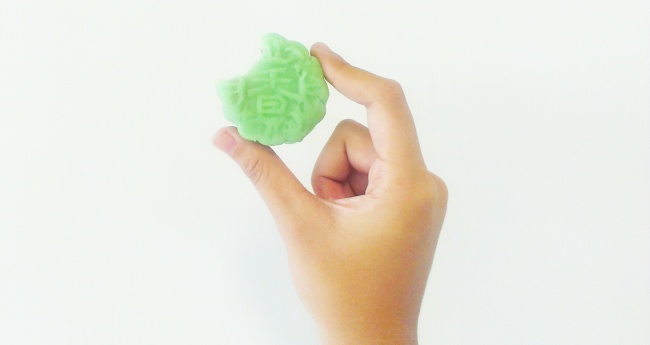
In the spirit of the Mid-Autumn festival, I would like to share yet another non-bake recipe. Snowskin moon cakes are non-bake, sweeter and definitely a contrast from the traditional salty-sweet moon cakes. However, are not favorited by many for its slight raw-flour taste. They come in many different flavours and I love them to death!!!

Also I have an announcement to make about a couple changes you might see on the blog and something about opening my mail for cake orders. So please stick with me to the end of the post if you’d like to hear more about these changes, thank you :))

Image


Ingredients:

(Skin)

115g cooked gluttonous rice flour (Kao fen)

85g Hong Kong flour

100g Icing

Essence (Depending on the flavor of your moon cakes)

80g Shortening


(Filling)

1kg Moon cake paste (Red Bean, Lotus, Green Tea)


Method:

  1. Steam Hong Kong flour in a covered bowl for 10-15 minutes.
  2. Sieve icing sugar, gluttonous flour and Hong Kong flour in to a big bowl.
  3. Combine shortening and essence and add water (to your discretion) until mixture resembles a bread-crumb like texture
  4. Mix everything until it comes together to pliable dough.
  5. Divide the skin’s dough and the paste equally into approximately 60g each and roll in to a ball.
  6. Roll the balls out to a disc and add in the filling to the center. (Be careful not to roll out the skins too thinly or thickly)
  7. Wrap skin around filling and seal tightly making sure there are no empty patches where the filling shows.
  8. Press in to dusted moon cake mould and refrigerate for at least 6 hours before serving.

Alright the recipe part is done. I would like you guys to know that towards the end of the year, I might be changing the contents of my blog a little bit. I will shift my focus from creating and writing up recipes to decorating and designing of the cakes. More of how-to’s and failed experimenting (if any). This would mean that the cakes I use would probably from cake mixes to save time and mess. Not to fret, original recipes will still be shared on the blog.

Also, I will be starting to take cake orders from November onwards. In terms of how you’d like the cake to be, I would never put a specific limitation on my ability and what I cannot produce. I’d take it as a healthy challenge to push my barriers and test my decorating skills. Orders are open for within Singapore only (I am aware that most of my readers are Europeans) so feel free to drop me an email at: cookforme@live.com 

That is all I have today, till next time foodies! 


Churros!

Wow, I have been away for a little too long haven’t I.
Anyway my oven is broken and I am unable to bake anything in it. I have a small toaster oven but that’s pretty redundant, I can probably only use it to grill small portions of meat.
But any way, I decided to make churros today since I didn’t need to bake anything in the recipe.
Churros are basically fried choux pastry coated in cinammon sugar and usually served with chocolate dippings. Bla bla bla, I should stop blabbering and give you the recipe.
Here goes!

image

image

Serves 1-2
Ingredients:
30g salted butter
30g caster sugar
1 cup water
1 cup plain flour
50g plain chocolate
25ml cream

Mix brown sugar with a little bit of cinammon. Prepare enough for coating.

Method:
1. Melt butter in a saucepan over low heat with sugar.
2. Once completely melted, add in water and flour.
3. Stir until the mixture thickens and forms a dough.
4. Preheat oil for deep-frying
5. Pipe out the dough using an open star tip (I used Wilton’s 4B for a narrower and smaller portion) in to the hot oil and cut the end with scissors to discontinue each churro.
6. Deep fry until golden brown.
7. Coat each churro with cinammon sugar.
8. Serve churros with melted chocolate with cream.

Alright, till next time! Hopefully my oven is still able to be fixed and use.

cookforme@live.com
@thenavycat (instagram)

3-in-1 sugar rush!

image
image

So about a month ago, I had an idea of a cake that was really mouth-watering. To me, at least. And since then I have been planning, researching, experimenting before coming up with an ultimate recipe that will impress, de-stress and be a success.

The recipe is a combination of 3 recipes. It sounds like a hassle, and honestly it kind of is to me. But with a good management of time and dovetailing, you won’t  find it too much of a hassle. It took me a total of 5 hours from start to finish including the setting of cakes and decorating it. Sounds like a lot of time but it might be because I made two 6″ cakes an had a couple of screw ups during the process. But from my mistakes I am able to share a better recipe. But the end product is going to be so worth it, the contrasting textures of each layers that just come together nicely in your mouth is so so satisfying. Without further a do, (brace yourselves, its going to be a long list of recipes and how-to’s) here is the recipe for a Cookie dough vanilla and fudge brownie cake.

Ingredients:

Brownie mix:
200g caster sugar
185g soft butter
190g dark coverture chocolate
1 teaspoon vanilla extract
3 large eggs
110g plain flour

Vanilla cake mix:
200g sugar
120g butter
2 eggs
1 teaspoon vanilla extract
180g self-rising flour
½ cup milk

Cookie dough:
170g butter, melted
165g light brown sugar
3 tablespoons caster sugar
¼ cup milk
1 teaspoon vanilla extract
Chocolate chips (desired amount)

Decorating:

500ml whipping cream
150g dark chocolate (to melt)

Method:

  1. Begin with the brownie mix by melting the chocolate, butter and sugar in a big bowl over a double boiler.
  2. Once mixture is well incorporated, fold in the flour and the eggs once the temperature has cooled slightly(to prevent scrambling)
  3. Bake in a preheated oven at 180°C for 30 minutes or until a toothpick inserted comes out clean.
  4. In a mixer, cream butter and sugar for the vanilla cake until light and fluffy.
  5. Add eggs one at a time and add in vanilla extract.
  6. Add in flour in separate additions and beat on low.
  7.  Slowly pour in milk while mixer is on low speed until it reaches a wet batter consistency
  8. Bake in the oven at the same temperature.
  9. For the cookie dough: In a large bowl, add melted butter and vanilla to sugar and stir well, add in flour and milk until it reaches a desired cookie dough consistency.
  10. Allow cakes to completely chill.
  11. In the same pan used to bake the cakes, layer cling wrap in the pan and press cookie dough down in to the pan and chill in the fridge.
  12. In the meantime, whip up the whip cream until stiff peak and spoon in to
  13. Once all cakes and cookie dough are chilled, pipe a layer of whipped cream on and lightly spread out lightly.
  14. Stack the cooled layer over the cookie dough that is still in its pan and pipe a layer of whipped cream again.
  15. Stack over the brownie and gently press down and let it set in the fridge or freezer for an hour at least.
  16. Once set, cover cake pan with a cake board and overturn.
  17. Gently remove cake pan and cling wrap and chill in freezer for a further 15 minutes.
  18. Frost exterior with whipped cream and pour over melted chocolate(allow it to drip by the sides)

Finally, allow the cake to rest and chill in the fridge for at least 2 hours before serving! Good luck on this amazing cake and enjoy, ciao!