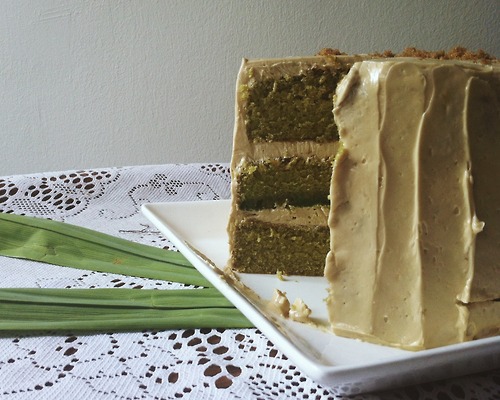
Ondeh-Ondeh inspired cake

“Ondeh-Ondeh” is a peranakan dessert that is very famous in South-East Asia, mainly Malaysia and here in Singapore. These treats are made from gluttonous rice four with water and Pandan leave extract to form a dough. The dough is then wrapped around palm sugar(Gula Melaka) pieces and boiled. To finish it off, Ondeh-Ondehs are rolled in shredded coconut before serving. The palm sugar that’s within the cute little Ondeh-Ondehs bursts in to your outh with every bite.

So my main inspiration for the recipe was to infuse the flavours from Ondeh-Ondehs which are Pandan, Palm Sugar and coconut in to a cake.

pandan cake

Gula Melaka swiss meringue buttercream

4 egg whites

200g gula meaka chpped up fine

100g whitesugar

450g unsalted butter

Pandan cake

8 eggs

200g plain flour

½ tsp bking powder

200g melted butter

6 tablespoon pandan extract

Pandan extract

10-12 pandan leaves

3-5 talespoons of water

Shredded/desiccated coconut for garnish

Method:

  1. Wash pandan leaves, cut them up in to small pieces and add them in to the blender with water and blend until it forms paste.
  2. Extract as much liquid as possible from the paste using a sieve.
  3. In a mixing bowl with a whisk attachment, beat eggs and sugar on high for about 10 minutes until ixture increases in volume.
  4. Add sifted flour, baking powder and pandan extract
  5. Bake at preheated oven of 160 degree celcius

Swiss meringue buttercream

  1. Add egg whites, white sugar and palm sugar in to a heatproof bowl over a ban marie.
  2. Stir constantly to dissolve sugar crystals then take off heat.
  3. Transfer contents in to mixer and ix on high with whisk attachment until stiff peaks and cooled
  4. Add in butter(cubed) one at a time making sure it has been fully .incorporated before adding more butter cubes.
  5. Frost cake and top with toasted shredded coconut

I hope you give this a try at home! It’s not too sweet for a cake and I really like it! Till next time, good luck!

cookforme@live.com                   v
Chocolate swiss meringue buttercream

Commonly, cupcakes and cakes are usually frosted with buttercream icing which mainly comprises of butter and a truckload of icing sugar.
For some, it might be way too much sugar in one mouthful considering the amount of sugar that goes in the cakes itself.
Swiss meringue buttercream is a silky smooth icing that isn’t too sweet and has a great texture that is similar to that of the traditional buttercream. However, unlike the traditional frosting, the swiss meringue does not crust up after a while. This means that it isn’t suitable for piping of buttercream roses and such.

Without further a do, here’s the recipe for  chocolate cupcake with chocolate swiss meringue buttercream.

Chocolate cupcake
Ingredients:
250g soft butter
250g caster sugar
200g self-raising flour
2 tbs cocoa powder
3 tbs milk
1 tsp vanilla essence
2 eggs

Method:
1. Cream butter, vanilla and sugar until pale and fluffy at high speed.
2. Add in eggs one at a time to prevent curdling
3. Bring the speed down to low and gradually add in flour and cocoa powder.
4. Once well combined, spoon in to cupcake liners.
5. Bake in preheated oven at 180 degree celcius for 15-20 minutes or until a toothpick inserted comes out clean.

Chocolate swiss meringue buttercream
Ingredients:
4 egg whites
300g caster sugar
400g unsalted butter
400g dark coverture chocolate

Method:
1. In a heatproof bowl, combine sugar and egg whites and set over a double boiler.
2. Using a whisk, keep stirring until sugar granules have dissolved (do not stop cooking, we don’t want to solidify the whites)
3. Once mixture is smooth and warm to touch, remove from heat and transfer to a mixer.
4. Whip the mixture on high speed until it forms stiff peaks and has cooled down.
5. Add in firm and slightly soft (not hard) butter in small cubes one at a time keeping the mixture on medium speed.
6. Once well combined, add in cooled melted chocolate in a steady stream while mixer is on low speed.
7. As soon as all the chocolate has been added, increase speed to high until well mixed.
8. Ready to use immediately or you can refrigerate to firm up the texture.

image

I left no toppings on the cupcakes but you can use m&ms or crushed nuts. To your preferance. Thank you for visiting!

cookforme@live.com
@thenavycat (instagram)

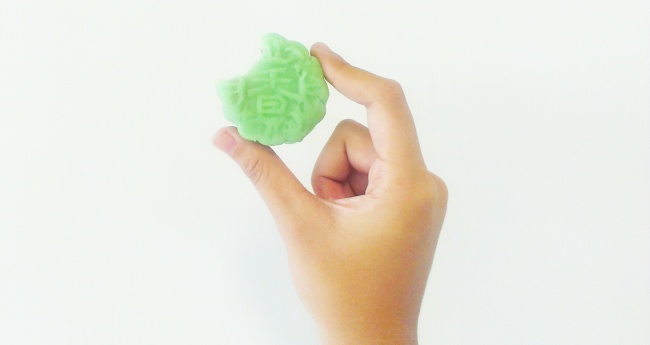
Snowskin Mooncakes

In the spirit of the Mid-Autumn festival, I would like to share yet another non-bake recipe. Snowskin moon cakes are non-bake, sweeter and definitely a contrast from the traditional salty-sweet moon cakes. However, are not favorited by many for its slight raw-flour taste. They come in many different flavours and I love them to death!!!

Also I have an announcement to make about a couple changes you might see on the blog and something about opening my mail for cake orders. So please stick with me to the end of the post if you’d like to hear more about these changes, thank you :))

Image


Ingredients:

(Skin)

115g cooked gluttonous rice flour (Kao fen)

85g Hong Kong flour

100g Icing

Essence (Depending on the flavor of your moon cakes)

80g Shortening


(Filling)

1kg Moon cake paste (Red Bean, Lotus, Green Tea)


Method:

  1. Steam Hong Kong flour in a covered bowl for 10-15 minutes.
  2. Sieve icing sugar, gluttonous flour and Hong Kong flour in to a big bowl.
  3. Combine shortening and essence and add water (to your discretion) until mixture resembles a bread-crumb like texture
  4. Mix everything until it comes together to pliable dough.
  5. Divide the skin’s dough and the paste equally into approximately 60g each and roll in to a ball.
  6. Roll the balls out to a disc and add in the filling to the center. (Be careful not to roll out the skins too thinly or thickly)
  7. Wrap skin around filling and seal tightly making sure there are no empty patches where the filling shows.
  8. Press in to dusted moon cake mould and refrigerate for at least 6 hours before serving.

Alright the recipe part is done. I would like you guys to know that towards the end of the year, I might be changing the contents of my blog a little bit. I will shift my focus from creating and writing up recipes to decorating and designing of the cakes. More of how-to’s and failed experimenting (if any). This would mean that the cakes I use would probably from cake mixes to save time and mess. Not to fret, original recipes will still be shared on the blog.

Also, I will be starting to take cake orders from November onwards. In terms of how you’d like the cake to be, I would never put a specific limitation on my ability and what I cannot produce. I’d take it as a healthy challenge to push my barriers and test my decorating skills. Orders are open for within Singapore only (I am aware that most of my readers are Europeans) so feel free to drop me an email at: cookforme@live.com 

That is all I have today, till next time foodies! 


Churros!

Wow, I have been away for a little too long haven’t I.
Anyway my oven is broken and I am unable to bake anything in it. I have a small toaster oven but that’s pretty redundant, I can probably only use it to grill small portions of meat.
But any way, I decided to make churros today since I didn’t need to bake anything in the recipe.
Churros are basically fried choux pastry coated in cinammon sugar and usually served with chocolate dippings. Bla bla bla, I should stop blabbering and give you the recipe.
Here goes!

image

image

Serves 1-2
Ingredients:
30g salted butter
30g caster sugar
1 cup water
1 cup plain flour
50g plain chocolate
25ml cream

Mix brown sugar with a little bit of cinammon. Prepare enough for coating.

Method:
1. Melt butter in a saucepan over low heat with sugar.
2. Once completely melted, add in water and flour.
3. Stir until the mixture thickens and forms a dough.
4. Preheat oil for deep-frying
5. Pipe out the dough using an open star tip (I used Wilton’s 4B for a narrower and smaller portion) in to the hot oil and cut the end with scissors to discontinue each churro.
6. Deep fry until golden brown.
7. Coat each churro with cinammon sugar.
8. Serve churros with melted chocolate with cream.

Alright, till next time! Hopefully my oven is still able to be fixed and use.

cookforme@live.com
@thenavycat (instagram)

Sambal Udang by Norman Musa

Recently i whipped up a Malay dish called sambal udang, which means prawns in chili based sauce. I decided to try and cook something close to my roots instead of always whipping up something that isn’t Asian. So I started to YouTube simple Malay dishes that I can effortlessly whip up within half an hour. Norman Musa’s videos came out on the search list a lot and I decided to watch his videos. I definitely enjoyed them! He makes simplified versions of the original Malay dishes for the sake of the western viewers that might find it very difficult to execute at home. 

I really liked his tutorials and recipes and I found out that he is a Malaysian chef  based in Manchester, United Kingdom. Norman is also the creator, co-owner and Executive Chef of Ning restaurants. The sambal udang recipe that I will be sharing with you is from his book “Malaysian food’ (i call it the Malaysian food bible). However I do have a slightly more convinient variation for the blended ingredients. And I know I’m supposed to be on this whole healthy diet thingy, this dish does not require a lot of fat. Just enough to fry your sauce base.SAMBAL UDANG

Serves two

Ingredients

16 tiger or king prawns, peeled and deveined

100ml cooking oil
4 tablespoons blended onion
1 tablespoon blended garlic
1 tablespoon blended ginger
125ml dried chilli paste
100ml tamarind juice
150ml water
1 teaspoon shrimp paste
4 tablespoons white sugar
1 teaspoon salt
1 carrot, peeled and cut into julienne strips

 8 kaffir lime leaves

Method

1.    Heat up a wok or saucepan and add in the cooking oil.
2.    Add the blended onion, garlic and ginger. Cook until fragrant. 
3.    Next, add the kaffir lime leaves and cook for another two minutes.
4.    Stir in the chilli paste, tamarind juice, sugar, salt, shrimp paste and only half of the water. Stir the ingredients well and make sure they are blended completely.
5.    Simmer on a low heat until the oil separates. This will give time for the chilli to be cooked properly. The gravy will thicken at this stage.
6.    Turn the heat back up and add in prawns, carrots and the remaining water. Cook until the prawns turn pink. The dish is best served with jasmine rice.

MY VARIATION

Everything is pretty much the same, just that I estimate the blended ingredients and blend them all at once.

1 small red onion (cut in to chunks)

2-3 cloves of garlic

thumb-sized ginger

Add a little water or oil and blend it in the food processor or the blender.

Just in case you’re wondering what dried chili paste is, it’s just dried chilies blended in to a paste with a little bit of water.

Tamarind juice can be replaced with lime or lemon if you can’t find it in the stores.

FINALLY, if you’re living in Manchester and you know of his restaurant, do check it out for me and tell me what the food is like. I’d loveeeeee to hear about it! Here is Mr. Norman’s website: normanmusa.com

That’s all for today!


Attempting to eat clean.

Hello! It’s Monday from where I’m at and it’s been a bad day for me so far (boooooo). Anyway, I’ve been working on getting nice abs because I felt the need to be extra fit and look good. So on top of cycling and working out everyday, I decided I should cut down on the fats in my food. But! I’m not going to over do this whole healthy diet thing, I mean I love food and we’ve got to be honest here, most good foods comes with a good amount of calorie. So today I whipped up a pita burger.
I was looking at using chicken breast meat and grilling it before shredding it and stuffing it in to a pita bread, but they only had minced chicken available so I ended up making a patty instead. You can always get a 90/10 split from your butcher, that way it’d be super lean.

20130408-180050.jpg
Serves 1-2
Ingredients:
150g minced chicken
1/2 yellow onion
2 cloves of garlic
1 slice of bread (blitz it in the blender for breadcrumbs)
1 egg
1 tablespoon curry powder
Pita bread
Choice of toppings: I used purple cabbage and green peppers and low fat cheddar cheese
Salt and pepper to taste
Oil for frying

Method:
1. Dice onion and garlic and add in to a bowl along with everything except the pita bread and toppings
2. Mix well. You should be able to mould it.
3. Toast the pita bread in a non stick pan.
4. Heat up the oil in the same pan after the bread has been toasted and fry the patty.
5. Stuff the vegetables and low fat cheese in the pita bread and try your best to fit the patty in there.

Of course you can use a burger bun or just a normal bread, completely up to you.

That’s all for now!

Email: cookforme@live.com
Instagram: thenavycat